100% Security Verified | No Subscription Required | No Malware

We've all experienced moments when the quality of a video isn't as good as we'd like it to be. This is especially true; an unsteady hand, poor lighting, or low-quality technology can prevent all damage to a video.
You're in luck if you've ever wondered how to improve video quality. We're going to look over the finest video quality enhancers today. Many video enhancers have been launched so far, and you might find it difficult to choose one for you. Let's begin:
Video enhancer 2.2
Video Enhancer is an application that uses the Super Resolution approach to boost video resolution. Super Resolution is a clever video upsizing method that uses information from neighboring frames to upsize the current frame. It gathers data. Therefore the more sequential frames processed, the greater the quality.
If the image in your video doesn't change too quickly, information from multiple frames can be combined to create a larger image, showing details that would otherwise be concealed. However, no regular image resize/resample techniques can achieve this quality because there isn't enough information in one frame.
How to use Video Enhancer 2.2?
Video Enhancers allow you to:
- Increase the resolution of your video with the Video Super-Resolution approach, which gives incredible quality by leveraging information from prior frames. At the same time, other resize methods only use information from one current frame. In addition, you may now convert SD video to HD!
- Use VirtualDub's hundreds of video filters to perform anything you want with your video, including deinterlacing, denoising, deshaking, color correction, sharpening, and visual effects.
Because all filters and codecs function in independent threads, Video Enhancer is much faster than VirtualDub.
- Open any video that can be played on your system and re-compress it using any video codec (DirectShow, DMO, or Video for Windows) that you have installed.
However, the step-by-step on how to use Video Enhancer 2.2
Step 1: Import the file
Download Video Enhancer 2.2 and launch the software.
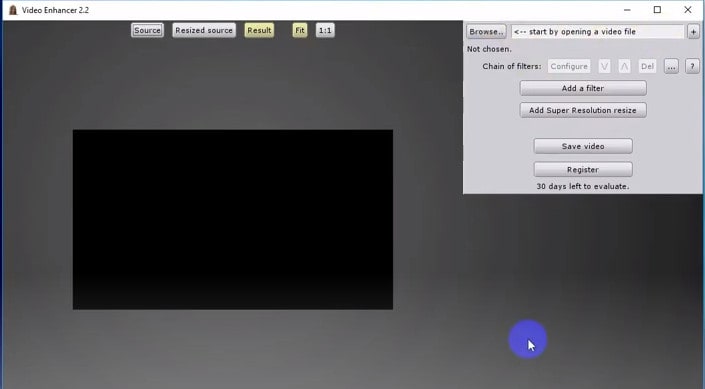
Once you have launched the software, import the file by clicking on 'Browse' to enhance video resolution.
Step 2: Edit the file
After uploading the video file, click on 'Add a filter,' and a pop-up window shows various editing options.
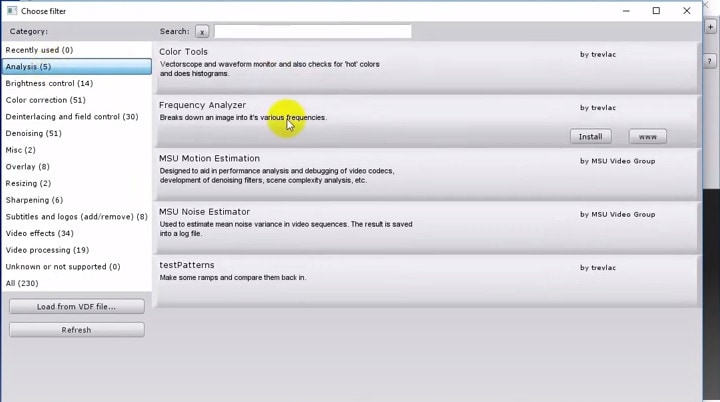
You can create chains with any number of VirtualDub and Super Resolution filters to apply to your video in the Advanced user interface mode. You can filter your video before, after, in between, or even instead of scaling.
With over a hundred VirtualDub filters, you can edit your video, including deinterlace, denoise, deshake, color correction, visual effects, etc. Video Enhancer will most likely recognize your filters if you have VirtualDub installed.
Step 3: Improve Video Resolution:
Once you are done editing the video, close the pop-up window and click on 'Add Super Resolution Resize' and change the video resolution.
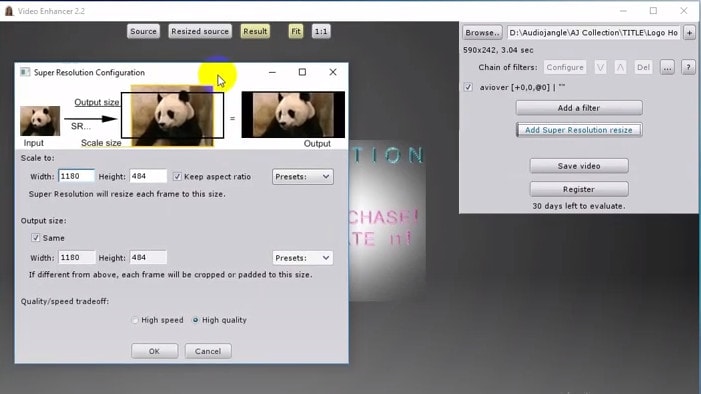
Step 4: Save the edited video file
Click the Save video to store or share your finished video if you're satisfied with the outcome. You can also change the configuration of the output file by selecting your preferred video and audio compressing options.
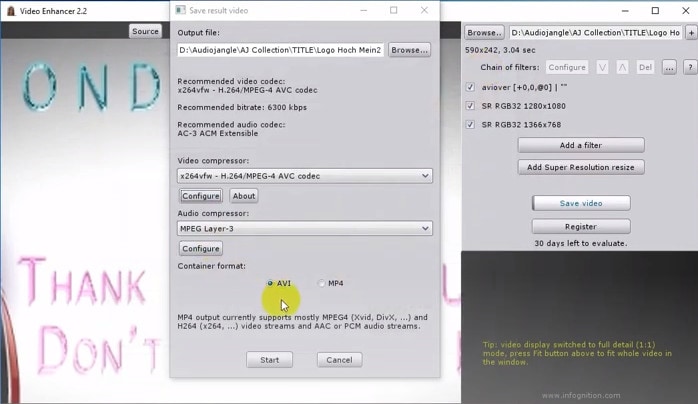
Video Enhancer will scan your system for 32-bit video and audio compressors and provide them in drop-down lists for you to choose from. If you have codecs from Video Enhancer's favored list, it will advise which codec to use and at what bitrate. The recommended bitrate is determined by the final video resolution and the codec. After that, it displays its recommendations in the text; you must select the codecs and set the bitrate in its settings to finish the process.
Alternative ways to enhance video
1. Wondershare Filmora:
Compatibility: Windows/Mac
Wondershare Filmora is a versatile video editor that combines easy-to-use editing tools with AI-powered quality enhancement features.
In Filmora, you’ll find professional tools for improving video clarity, along with 300+ creative filters and effects that help give footage a more polished look. It also includes 100+ advanced editing features and AI tools designed to make enhancement faster and more accessible.
Among them, AI Video Enhancer is a convenient option for improving blurry or low-quality footage automatically. Depending on your needs, you can use standard enhancement, Generative Enhance for more natural detail recovery on short clips, or advanced Topaz-powered models for higher-quality restoration.
 Secure Download

If you want to use AI to improve video quality in Filmora, follow these simple steps:
Step 1: Import media files
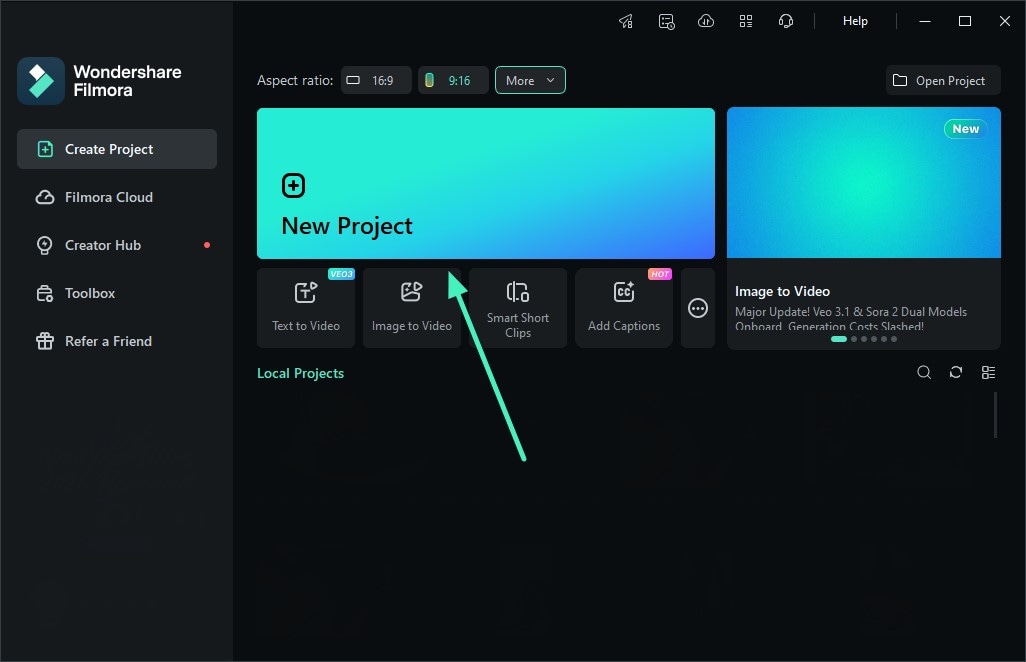
Open Wondershare Filmora, choose "New Project," and import your video into the media library. Then drag the clip onto the timeline to start editing.
Step 2: Open AI Video Enhancer
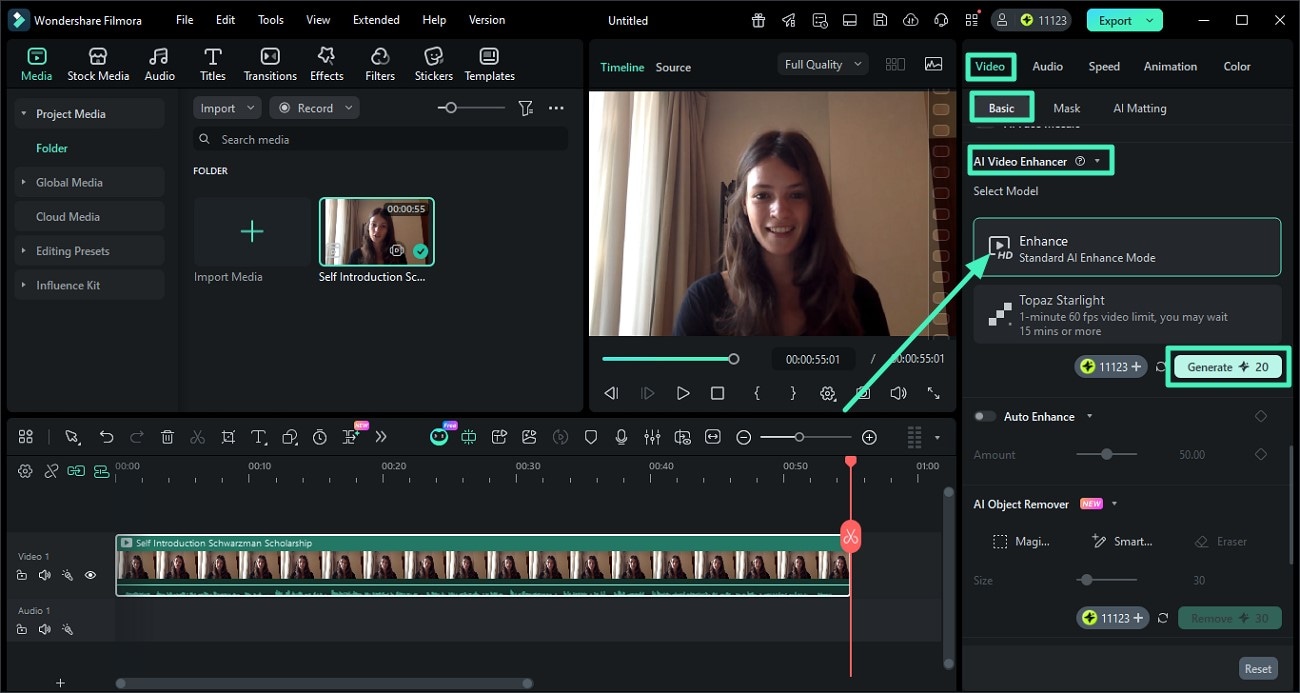
Select the clip on the timeline, then go to the right-side properties panel and open Video > Basic. Scroll down to find AI Video Enhancer and turn it on.
Step 3: Choose the enhancement mode and generate
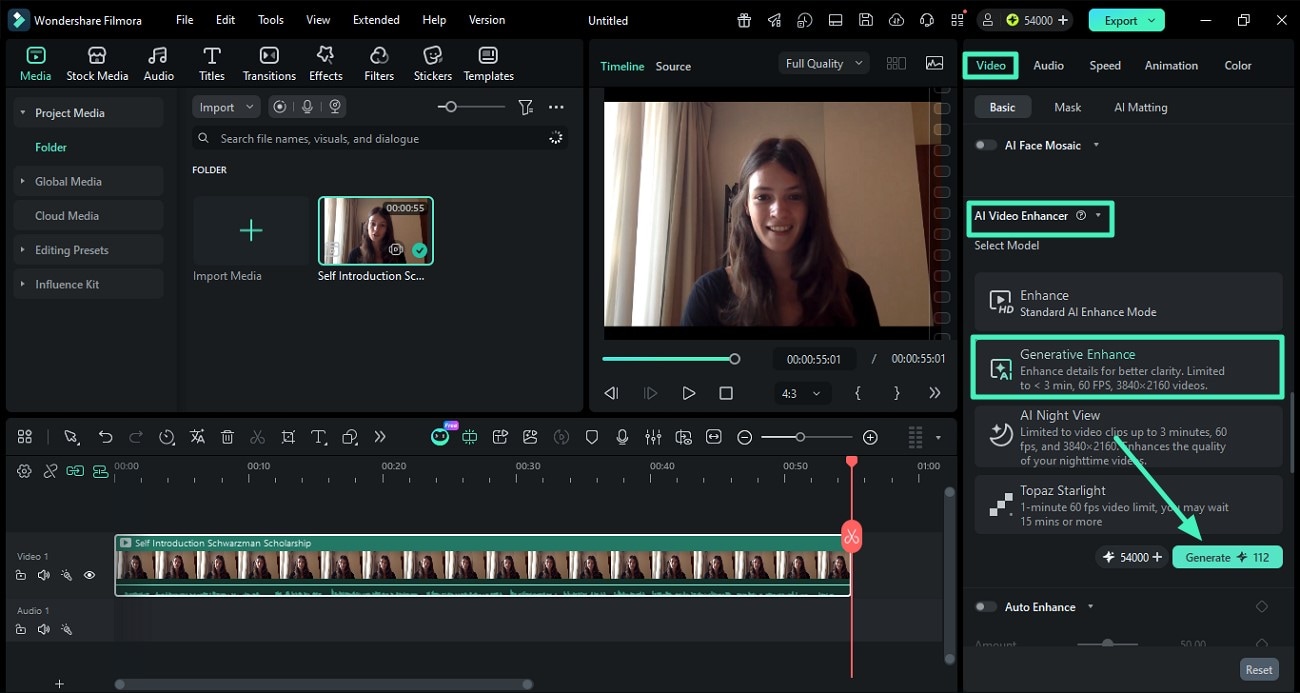
Pick the option that best matches your footage. You can use the standard model for general enhancement, or choose Generative Enhance if you want more natural-looking detail recovery for short videos. Then click Generate to start processing.
Step 4: Preview and export video
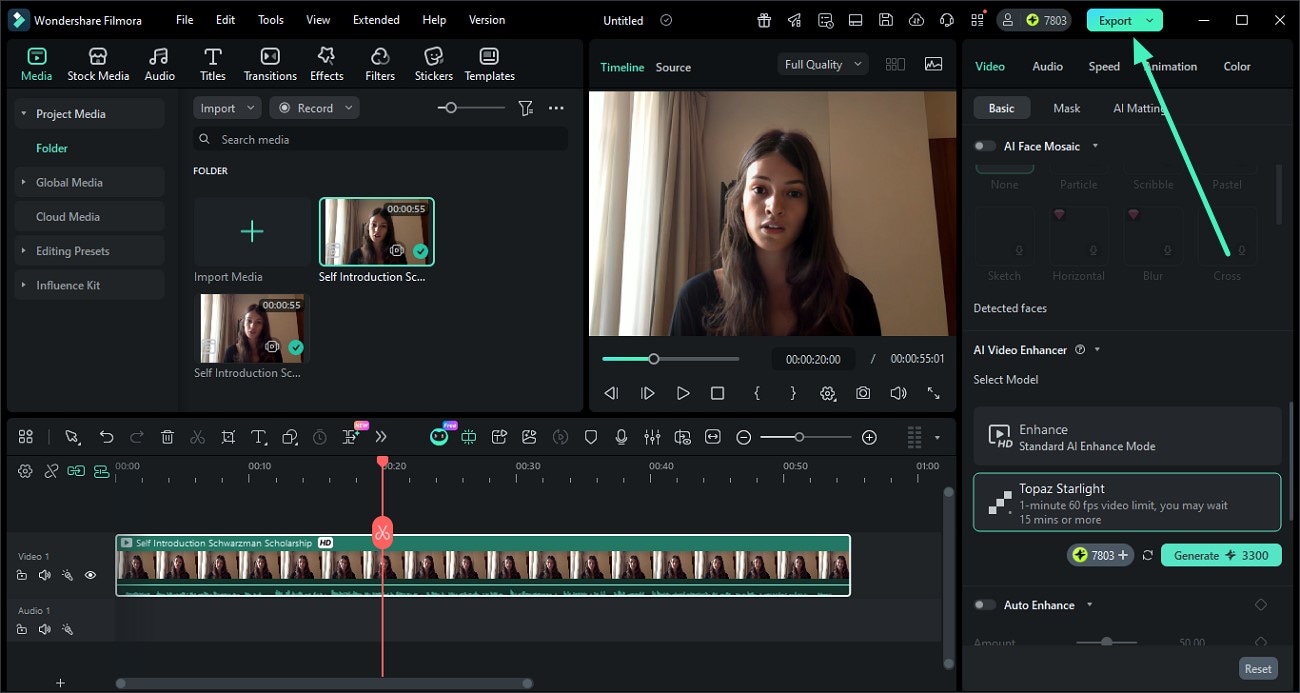
Preview the enhanced result in the player window. If you’re satisfied with the improvement, click Export to save or share the finished video.
In addition to unblurring videos, you can also use the video denoiser feature to remove grain when needed.
2. iMovie:
Compatibility: macOS, iOS
Instead of paying hundreds of dollars on video editing tools, Mac users can use iMovie to edit their videos. The best thing is that the software works on iPhones, iPads, and Apple laptops, allowing you to edit your footage as soon as you take it.
iMovie supports 4K films and makes the editing process enjoyable and simple. You only need to arrange your clips on the timeline, choose background music, make opening titles and closing credits, or add interesting visual effects. Then, your videos are ready to be shared with the public.
You can use the following steps to enhance the video quality:
Step 1: Navigate to the project browser and choose the video clip you wish to modify. To begin the resizing process, click the crop button. You can also press the R key on your keyboard.

Step 2: Drag and resize your movie by dragging and repositioning the green rectangle. Stop pressing the resize button after you're happy with the final size.
Step 3: View the video on the viewer to see how it looks after resizing.
3. HDConvert
Compatibility: Online
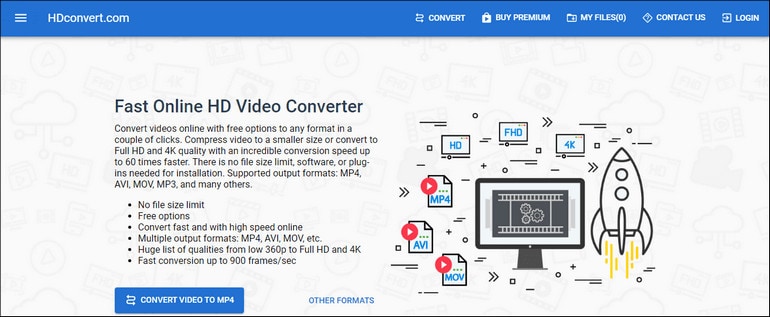
HDconvert is a video file converter that enables users to change the format of their video files. Additionally, the platform provides a variety of export options, including the ability to change the resolution of your video files. There are no file size restrictions, so that you can upload any file to HDconvert, regardless of its size. However, huge video files may take some time to upload.
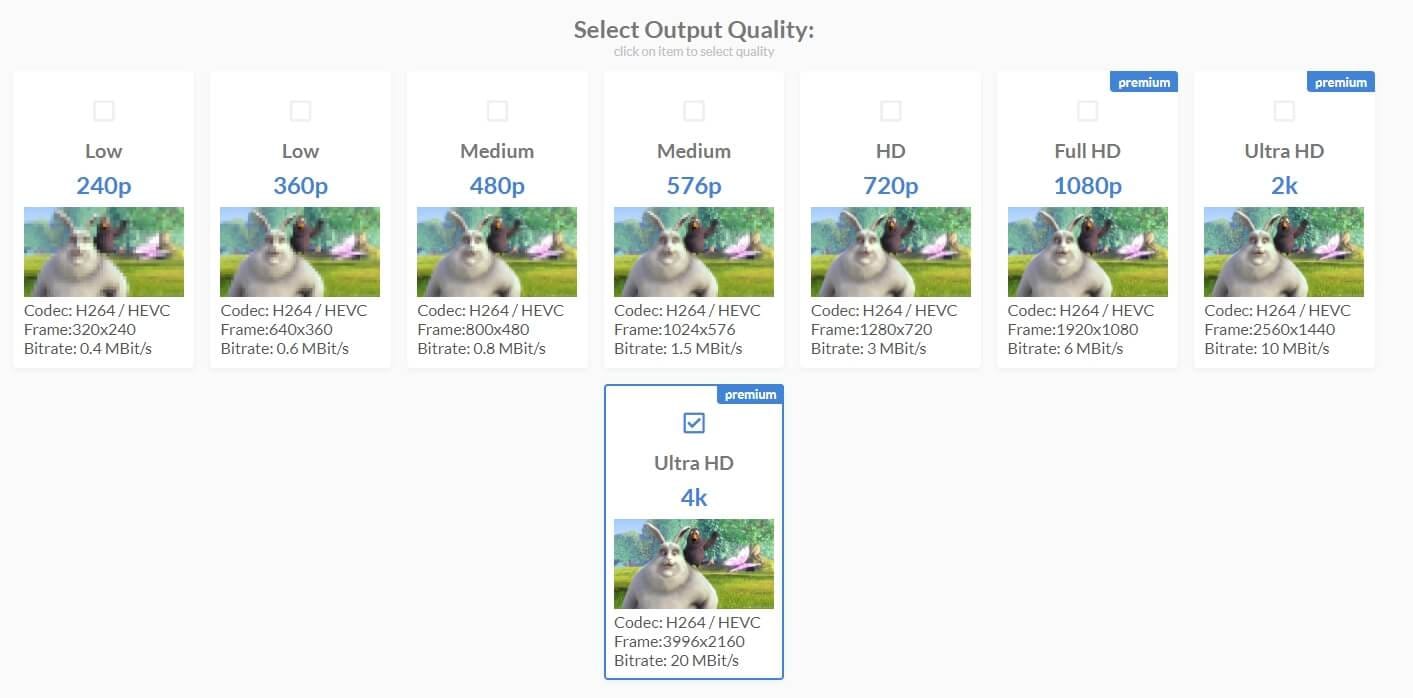
After the upload is complete, you can select various video resolutions, ranging from 240p to UHD 4K. If you wish to export your video files in Full HD, Ultra HD, or 4K resolution, you'll need to upgrade to the premium edition of HDconvert. Furthermore, use the free version of HDconvert to modify the resolution of your videos. Unfortunately, you won't be able to change the default video codec to video codec.
You can use the following steps to enhance the video quality:
Step 1: Go to HDconvert.com and press the button in the center to begin converting a file right away.
Step 2: To continue, upload a video file and select MP4 as the desired video format.
Step 3: Select Full HD 1080p as the output video quality if you're on the premium plan. Aside from that, you can only convert video to HD 720P.
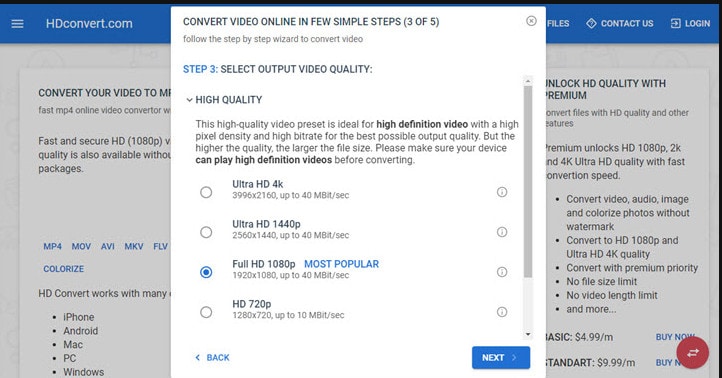
Step 4: Once the standard video has been converted to HD, download the video to your device as soon as possible because the download URL will expire in 24 hours.
4. InShot
Compatibility: Android/iOS

Because the software is both a video editor and a video producer, you have complete control over how to enhance the quality of a movie. A video trimmer, splitter, and merger, a plethora of filters and effects, speed controls, a video format converter, and an audio editor, are all included in InShot.
The app would appeal to social media addicts looking for a video quality enhancement. It comes with a pre-set list of size ratios covering all major social media platforms, ensuring that your video is suitable for all audiences.
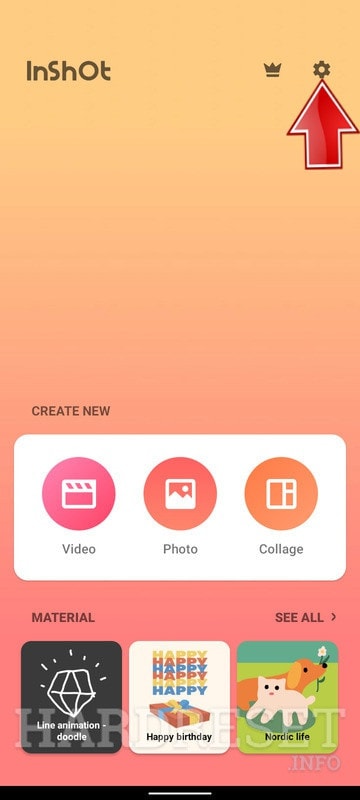
Step 1: Open the InShot app and select the gear icon at the top of the page.
Step 2: Go to the Video Settings area and tap it.
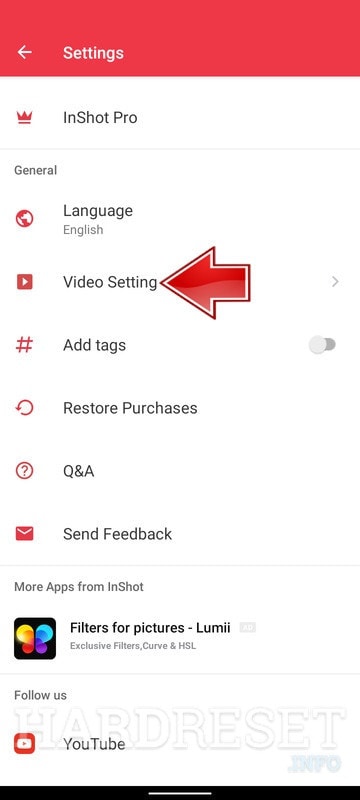
Step 3: Select Video Resolution from the drop-down menu.

Step 4: On InShot, choose the resolution you wish to use.
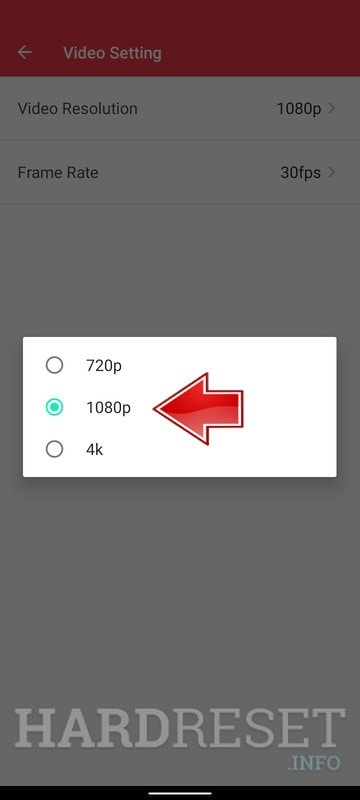
Step 5: Excellent! On InShot, you've modified the video resolution.